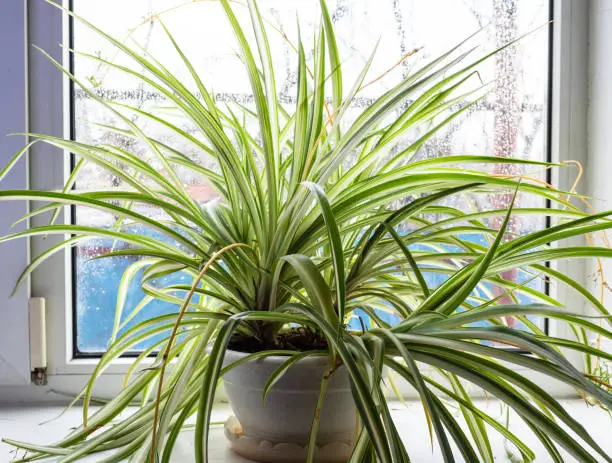
Repotting is a crucial aspect of caring for houseplants, and spider plants (Chlorophytum comosum) are no exception. Whether your spider plant has outgrown its current pot, you’ve noticed signs of root congestion, or you simply want to refresh its soil, repotting can rejuvenate and promote healthier growth. In this beginner’s guide, we’ll take you through the step-by-step process of repotting a spider plant, from recognizing the signs it’s time to repot to providing the right conditions for a successful transition.
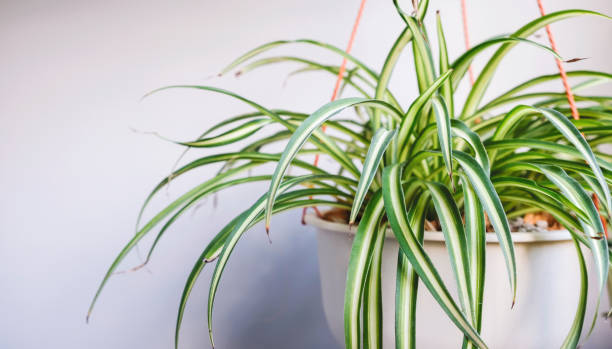
Signs Your Spider Plant Needs Repotting
Before diving into the repotting process, it’s essential to identify when your spider plant might be ready for a new home. Look out for these signs:
- Roots Emerging from Drainage Holes: If you notice roots poking out from the bottom of the pot, it’s a clear indication that the spider plant has outgrown its current container.
- Sluggish Growth: If your spider plant’s growth has slowed down, despite proper care, it might be struggling due to a lack of space for root expansion.
- Soil Depletion: Over time, the potting mix loses nutrients, and repotting provides an opportunity to refresh the soil with a nutrient-rich mix.
Now that you’ve identified the signs, let’s explore the step-by-step process of repotting your spider plant.
Step 1: Gather Your Supplies
Before you start the repotting process, ensure you have all the necessary supplies ready. Here’s what you’ll need:
- New Pot: Choose a pot that is 1-2 inches larger in diameter than the current one. Ensure it has drainage holes to prevent waterlogging.
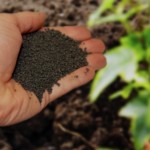
- Fresh Potting Mix: Select a well-draining, nutrient-rich potting mix suitable for indoor plants.
- Trowel or Scoop: A small trowel or scoop will help you remove the plant from its current pot and transfer it to the new one.
- Watering Can: Prepare a watering can to hydrate the plant after repotting.
- Pruning Shears: Have pruning shears or scissors on hand for any necessary trimming.
Step 2: Choose the Right Time to Repot
The best time to repot a spider plant is during its active growing season, typically in spring or early summer. This allows the plant to recover quickly and establish itself in its new environment. Avoid repotting during the dormant period in fall or winter.
Step 3: Water the Plant
Before repotting, water your spider plant thoroughly. Moist soil makes it easier to remove the plant from its current pot without causing stress to the roots. Allow the water to drain for a few hours before proceeding to the next step.
Step 4: Remove the Spider Plant from its Pot
Place your hand over the soil surface, securing the base of the plant between your fingers. Turn the pot upside down and gently tap the bottom and sides to loosen the plant. Carefully slide the plant out, supporting the root ball.
Step 5: Inspect and Untangle the Roots
Once the spider plant is out of its pot, inspect the roots. If they appear tightly wound or circling the root ball, gently tease them apart. This encourages outward growth and prevents future root issues.
Step 6: Trim Unhealthy Roots
While inspecting the roots, trim any brown or mushy roots with clean pruning shears. Healthy, white roots indicate an active and growing root system.
Step 7: Prepare the New Pot
Place a layer of fresh potting mix at the bottom of the new pot. Position the spider plant in the center, ensuring that the top of the root ball sits about an inch below the rim of the pot. Add more potting mix around the sides until the plant is securely positioned.
Step 8: Fill in with Potting Mix
Fill the remaining space around the sides of the root ball with fresh potting mix, gently pressing down to eliminate air pockets. Leave about an inch of space between the soil surface and the rim of the pot to allow for easy watering.
Step 9: Water the Plant
After repotting, water the spider plant thoroughly. This helps settle the soil and hydrates the roots. Allow excess water to drain out from the bottom.
Step 10: Place the Repotted Spider Plant in a Suitable Location
Choose a location with appropriate light conditions for your spider plant. While they can tolerate various light levels, placing them in bright, indirect light promotes optimal growth. Avoid direct sunlight, as it may scorch the leaves.
Step 11: Monitor and Care for the Repotted Plant
Keep a close eye on your spider plant in the days and weeks following repotting. Adjust your watering routine as needed, ensuring the soil remains consistently moist but not waterlogged. Resume regular fertilization during the growing season to provide essential nutrients.
Additional Tips for Successful Repotting:
- Patience is Key: Give your spider plant time to acclimate to its new pot. It may take a few weeks for the plant to show signs of renewed growth.
- Use Quality Potting Mix: Invest in a high-quality potting mix with good drainage properties. This ensures optimal aeration and prevents waterlogged conditions.
- Avoid Overpotting: While it’s essential to provide enough space for root growth, avoid excessively large pots. Overpotting can lead to waterlogging and hinder the plant’s development.
- Repot Every 1-2 Years: As a general rule, consider repotting your spider plant every 1-2 years, even if it doesn’t show clear signs of needing it. This helps refresh the soil and promotes overall plant health.
Conclusion
Repotting a spider plant may seem like a daunting task for beginners, but with the right approach and a bit of care, it becomes a rewarding and necessary aspect of plant maintenance. By recognizing the signs that your spider plant needs repotting and following this step-by-step guide, you’re not only providing your green companion with a larger home but also setting the stage for vibrant, healthy growth. Remember, each step is a gesture of care towards your plant, and the benefits will be evident in its flourishing foliage.